
Repairing a hydraulic piston pump requires more than replacing seals or polishing visible wear. Reliable work starts with proving that the pump is responsible for the fault. A qualified technician must identify the exact model, follow its service manual, work cleanly, and verify performance after assembly.
Effective hydraulic piston pump repair starts with accurate fault diagnosis, safe removal, clean disassembly, component measurement, and controlled performance testing. Key topics include confirming whether the pump is actually at fault, choosing between repair, rebuild, and replacement, inspecting critical internal parts, preventing repeat failure, and preparing the technical information needed to source compatible parts or a replacement pump.
Hydraulic Piston Pump Repair at a Glance
A controlled repair process normally follows eight stages:
1. Make the machine safe and release stored hydraulic energy.
2. Record the complete pump model, circuit type, symptoms, and operating data.
3. Test pressure, flow, temperature, controls, and case drain before removing the pump.
4. Clean the surrounding area, label every connection, and protect open ports.
5. Disassemble the pump according to the correct service manual.
6. Clean, inspect, and measure each critical component.
7. Replace approved parts and reassemble with the specified orientation and torque.
8. Fill, bleed, test, and correct the system condition that caused the failure.
Skipping diagnosis can waste parts and leave the original problem in the machine. Contamination, suction restriction, excessive case pressure, incorrect rotation, or a control fault can damage the next unit.
Confirm That the Piston Pump Is Actually Faulty
Low pressure does not automatically prove that a hydraulic piston pump is worn. Pressure develops when flow meets resistance. A pump may still reach the relief setting while delivering too little flow for normal machine speed. Similar symptoms can also come from a valve, cylinder, motor, controller, coupling, blocked inlet, or slow prime mover.
Record whether the problem appears with hot oil, under load, in one direction, or during a particular function. Note noise, slow movement, unstable control, leakage, rising temperature, and recent service changes.
Measure pump speed, outlet pressure, delivered flow, oil temperature, case pressure, and case drain flow where the approved procedure allows. Compare results with the exact manufacturer limit or a known normal baseline at the same operating condition. Avoid using one universal case drain value for every pump.
Check oil level, oil condition, filters, inlet hoses, relief valves, control signals, and actuator leakage before removal. One slow function may point to its valve or actuator. Weakness across all functions as oil warms makes internal leakage more relevant.
Prepare for Safe and Clean Repair Work
Hydraulic systems can retain pressure and move loads after the power source stops. Follow the machine maker's instructions and the site's approved isolation, blocking, pressure release, and electrical safety procedures. Do not search for a pressurized leak with a hand. Running tests should be planned and performed by qualified personnel with suitable instruments and guards.
Record the manufacturer, complete model code, serial number, displacement, rotation, control code, shaft, flange, ports, and circuit type.
Prepare clean plugs, identification tags, approved cleaning materials, precision measuring tools, torque tools, and required fixtures. Stop if the correct manual, repair limits, measuring equipment, or testing capability is unavailable.
Decide Whether to Repair, Rebuild, or Replace
Minor repair may be reasonable when damage is limited to an external seal or serviceable control component, provided the shaft, housing, and internal group remain within specification. Seal leakage should still trigger a case pressure and drain line check because a new seal will not correct excessive housing pressure.
A full rebuild makes sense when damage can be measured, reusable parts meet the limits, correct parts are available, and testing can confirm the result. Rotary group replacement will not correct a damaged housing, shaft, control, or contaminated circuit.
Complete replacement becomes practical when the housing is cracked, the shaft is bent, precision surfaces exceed repair limits, parts cannot be verified, or downtime outweighs repair savings. Compare cleaning, oil, filters, labor, testing, freight, and commissioning, not only parts prices.
Step by Step Hydraulic Piston Pump Repair Process
1. Preserve the Evidence
Photograph the nameplate, pump, ports, hose routing, controls, and visible leakage. Save relevant alarms, operating readings, oil samples, and filter findings. Record adjustment positions before touching them. This evidence helps separate normal wear from contamination, cavitation, overload, or a control problem.
2. Clean and Remove the Pump
Wash the exterior and the surrounding installation area before disconnecting any line. Mark each hose and port, then fit clean compatible caps as soon as a connection is opened. Protect the shaft, spline, mounting face, and control components during transport.
3. Disassemble in the Correct Sequence
Follow the manual for the installed series and revision. Photograph each stage and keep small parts in identified groups. Record the position of the end cover, valve plate, rotating group, controls, and adjustment components. Do not force precision parts with improvised striking tools.
4. Clean and Inspect Components
Use a cleaning method compatible with the pump materials and fluid. Keep lint and abrasive debris away from precision surfaces. Damage on replaced parts may still reveal the original cause.
5. Measure Before Choosing Parts
Visual inspection cannot confirm clearance, flatness, end play, or bore condition. Measure critical parts using the procedure for that model and compare results with current service data. Do not transfer tolerances between models.
6. Replace or Recondition Approved Parts
Common replacement items may include seals, bearings, piston and shoe assemblies, valve plates, cylinder blocks, shafts, or complete rotating groups. Some components must remain matched sets. Surface restoration or lapping should only be used when the manufacturer permits it and the finished dimensions can be verified.
7. Reassemble With Clean Hydraulic Fluid
Lubricate internal moving parts with the specified clean fluid during assembly. Confirm component orientation before closing the housing. Install seals without damaging their lips or grooves. Tighten fasteners in the specified sequence and use the torque values for the exact pump configuration.
How to Interpret Piston Pump Wear Patterns and Identify the Root Cause
Scoring on pistons, bores, valve plates, or the cylinder block may point to contamination or lubrication loss. Pitting near flow passages may suggest harmful inlet conditions. Heat discoloration directs attention to friction, cooling, fluid condition, or leakage.
Rounded slipper edges, retainer damage, a displaced shaft seal, or unusual swash plate marks can justify checking case pressure and the drain path. Rough bearings, damaged splines, or uneven shaft wear may indicate alignment, coupling, or mounting problems.
Avoid deciding from appearance alone. A clean looking part can still exceed its dimensional limit. Record observations, measurements, decisions, and replacements so the repair has a traceable basis.
Prime, Test, and Validate the Repaired Pump
Fill the housing and prime the inlet or charge path as required by the model instructions. Confirm rotation, port connections, open drain lines, fluid type, control position, and filter condition before starting.
Begin in a controlled low risk condition. Watch for failure to prime, abnormal noise, leakage, air, rapid heating, or excessive case pressure. Increase load only after stable flow and lubrication are established. Record speed, oil temperature, inlet or charge pressure, outlet pressure, flow, case pressure, case drain flow, and control response.
Machine movement alone does not verify a repair. Compare hot operating data with the service limit or an approved baseline. Stop if readings drift, noise develops, or output remains low.
Prevent Repeat Failure
Inspect and clean the reservoir, hoses, valve blocks, cooler, filter housings, and related units where debris may remain. Replace filters under the recovery plan and refill with specified filtered fluid.
Correct suction restrictions, air entry, excessive case pressure, unsuitable viscosity, poor cooling, misalignment, wrong rotation, control errors, and pressure spikes before returning the machine to service. Keep a commissioning record so later changes can be compared with a known condition.
Choose Bohang Repair Parts or a Replacement Pump for Your Application
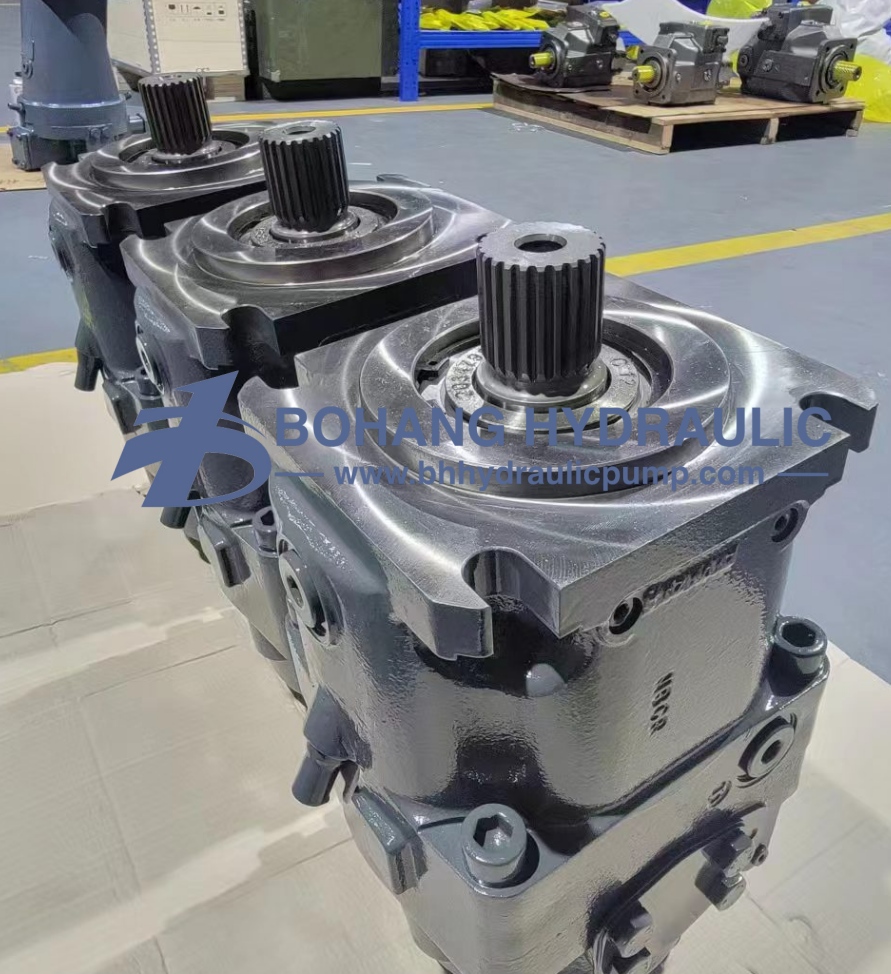
Inspection results should determine whether you need wear parts, a rotating group, or a complete pump. Bohang supplies piston pump spare parts and replacement pump options for mobile and industrial hydraulic equipment, including A2FO, A4VSO, A4VG, A7VO, A10VO, and A11V(L)O families. Applications include construction, mining, agriculture, material handling, marine equipment, and industrial systems.
Series name alone does not confirm compatibility. Accurate matching requires the complete model code, displacement, rotation, circuit type, flange, shaft, ports, case drain, control code, hydraulic fluid, and operating conditions. Clear nameplate photos, pump images, and inspection findings help reduce identification errors and support a more relevant quotation.
Bohang also provides product data, user manuals, a replacement checklist, and a custom solution path for nonstandard requirements. Browse piston pump spare parts, review hydraulic pump optionssend your pump details for a quotation.
FAQ
Q1. How do I confirm that the hydraulic piston pump is causing low pressure?
A: Low pressure alone does not confirm pump failure. Check oil level, inlet restriction, relief valves, controls, actuator leakage, pump speed, flow, temperature, case pressure, and case drain behavior under a defined operating condition.
Q2. Can a seal kit restore a weak piston pump?
A: A seal kit can correct confirmed leakage. It cannot restore worn pistons, cylinder bores, valve plates, bearings, or controls. Diagnose pressure and flow loss before ordering parts.
Q3. When should a hydraulic piston pump be replaced instead of rebuilt?
A: Replacement may be more practical when the housing is cracked, the shaft is bent, critical surfaces exceed repair limits, parts cannot be verified, or testing cannot confirm the rebuild.
Q4. What information is needed to order the correct piston pump parts?
A: Provide the complete model code, displacement, rotation, shaft, flange, ports, circuit type, control code, fluid, and nameplate photos. A machine model or family name is not enough. Check Bohang's replacement compatibility checklist before ordering.
Q5. Does a rebuilt pump need testing?
A: Yes. Fill and prime it according to the manual, then record speed, pressure, flow, temperature, case pressure, leakage, and control response under controlled conditions.
Q6. Why can a repaired or replacement pump fail again?
A: Repeat failure often points to contamination, inlet restriction, air entry, excessive case pressure, misalignment, unsuitable fluid, poor cooling, incorrect rotation, or an unresolved control problem.
Q7. Can Bohang help with both repair parts and complete replacement pumps?
A: Yes. Bohang supplies selected piston sets, cylinder blocks, valve plates, piston shoes, bearings, seal kits, swash plates, and complete hydraulic pump options. Send the model code, photos, operating data, and inspection findings to request a suitable sourcing option.